Most users can set up Rollo using the automated settings. However, if your network has certain restrictions, you may need to follow the manual steps below.
If you have challenges in connecting your printer wirelessly or are unable to create custom sizes, you may need to manually add your Rollo wireless printer. Follow the steps below to resolve the issue:
1) First, please insert 4x6 labels into the printer then press and hold the WiFi LED for 2-3 seconds, it should print a network test page, and take note of the printer Web page URL.
You may refer to the sample picture below on where to locate the local address:

2. Download and install the Rollo driver using this direct link: https://rollo.com/driver-dl/Rollo-Windows-Latest.zip
3. Go to Control Panel > Devices and Printers > Add a printer


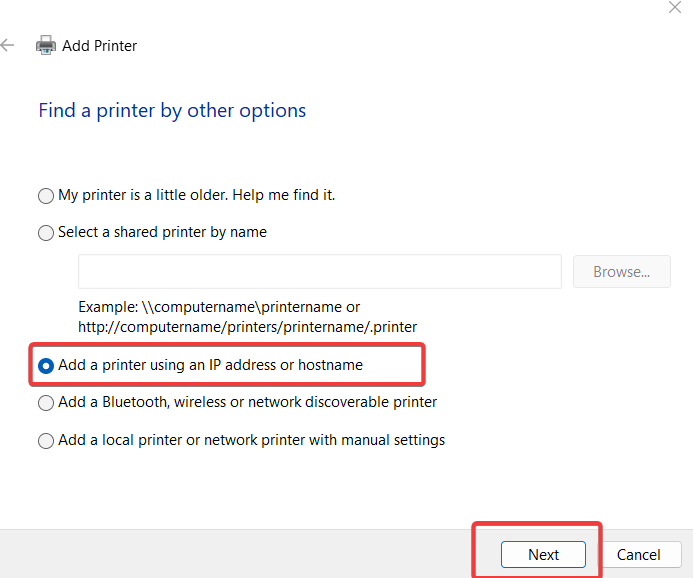
4. Then choose the 3rd option, add a printer using an IP address or hostname then next.
5. Choose TCP/IP device on the drop-down and then enter the local address which is shown on the network test page, sample local address: rollo-e8-54-7a.local (example only)
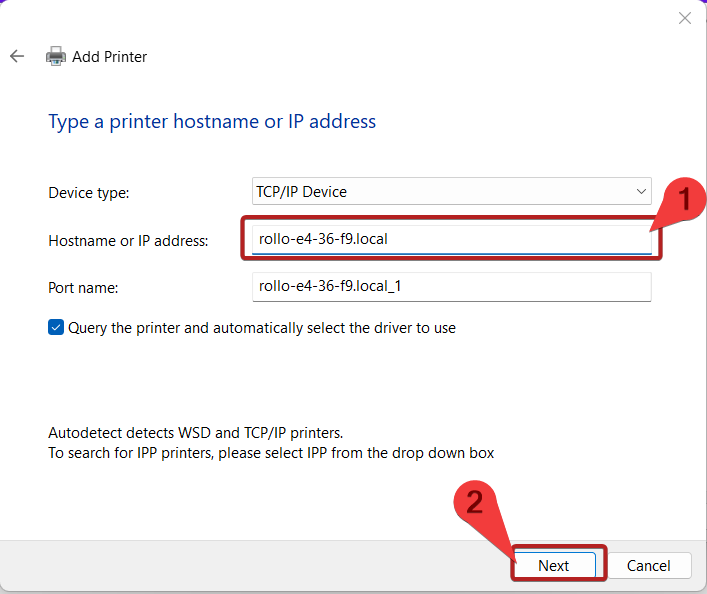
6. Just click on next once you have this page.

7. On the next page, please click on Rollo and the Rollo driver you installed then next

8. On this page, just click next:

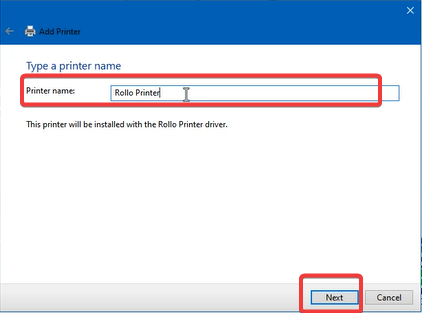
9. You may rename this new printer whatever you want to.
10. Next page will ask you to "do not share this printer" just click on next. Then on this page just click on finish.
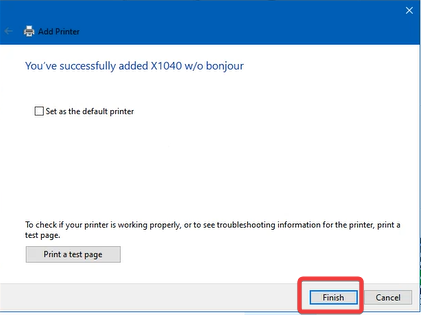
You have successfully added your Rollo Wireless Printer Manually. You can now try and print your label.
If you wish to proceed and create your custom sizes, please see the steps below:
> Open Printers and scanners
> Select the newly added Rollo
> Select Manage Button, then printing preferences
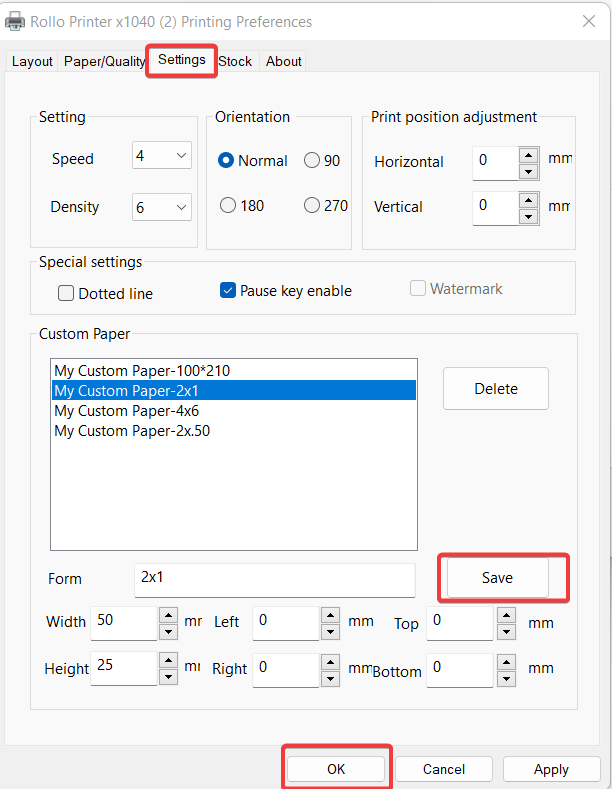
> Go to Settings tab, enter a Form name, then the width and height
> Click Save
> Apply then OK
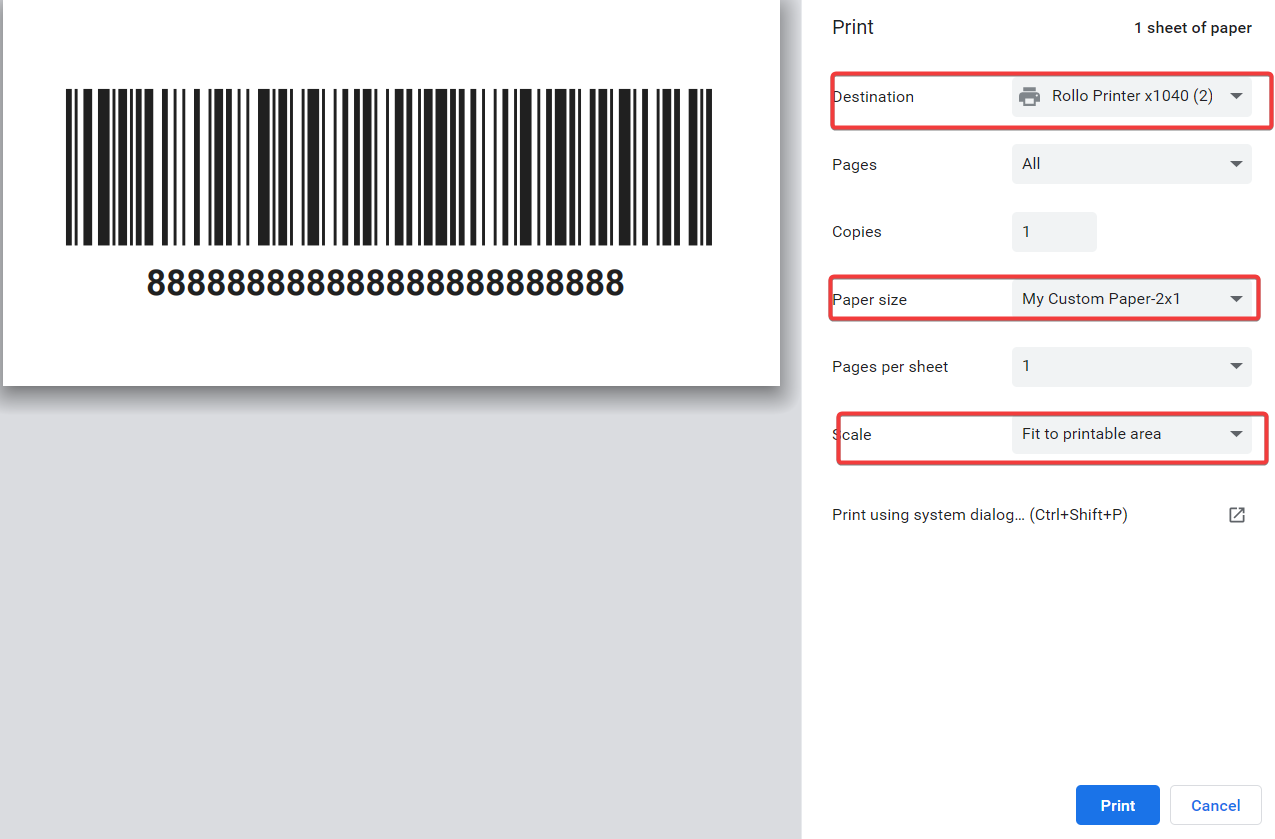
When printing your custom label, please change the destination/printer to the latest Rollo X1040 you've added, choose the size, and set the scale to Fit to printable area or fit to paper:
